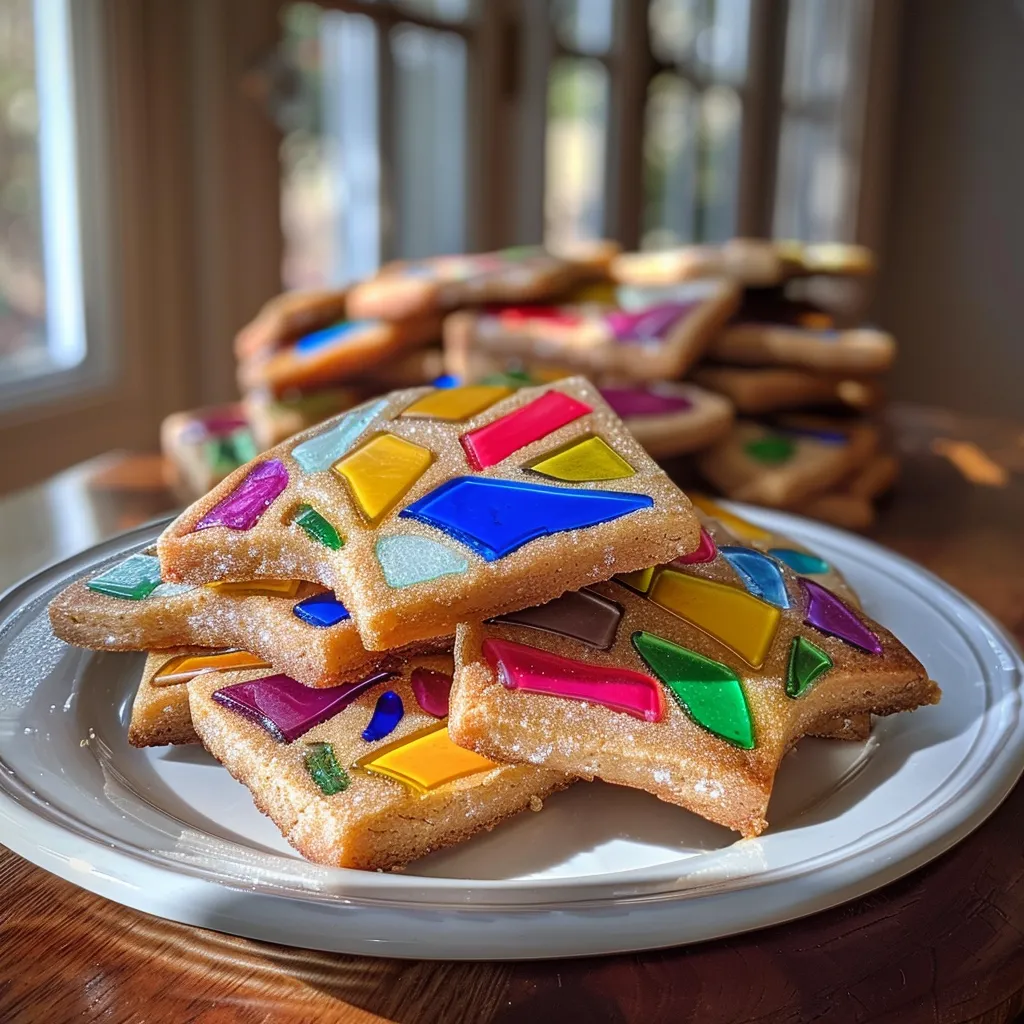
Hey there, fellow kitchen adventurers! If you’ve ever found yourself knee-deep in flour, sugar, and a sprinkle of chaos, you’re in the right place. Today, we’re diving into a delightful cookie escapade that’s as colorful as it is delicious: Easy Stained Glass Cookies! These whimsical treats are perfect for any occasion, whether you’re decking the halls for Christmas or just looking to brighten up a rainy day. Trust me, these cookies are about to become your new go-to for sweet munchies that’ll make your heart sing and your taste buds dance.
Now, let’s be real—baking can sometimes feel like a game of Tetris. You’re juggling mixing bowls, cookie sheets, and maybe a rogue egg that decided to roll off the counter. But that’s all part of the fun! With these Easy Stained Glass Cookies, the only thing you’ll be worried about is how many you can sneak before they even cool down. So, grab your apron, and let’s make some magic (and maybe a little mess) together! 🍪✨
Why You’ll Absolutely Love Easy Stained Glass Cookies
Why, you ask? Oh, let me count the ways! These cookies are not just a feast for the tummy; they’re a feast for the eyes too! Here’s why you’ll absolutely love whipping up these colorful delights:
- They’re visually stunning! Who wouldn’t want to bite into a cookie that looks like a piece of art?
- Easy to make with simple ingredients that you probably already have in your pantry. Less stress, more yum!
- Perfect for decorating with kids! Get those little hands involved and watch them create their own masterpieces.
- They make for fabulous gifts! Wrap them up in a cute box, and you’ve got a sweet present that’s sure to impress.
Ingredients You’ll Need
Alright, let’s talk ingredients! For these Easy Stained Glass Cookies, you’ll need a handful of pantry staples that come together to create a delightful treat. Here’s what you’ll be gathering:
- 1 cup unsalted butter, softened
- 1 cup granulated sugar
- 1 large egg
- 1 teaspoon vanilla extract
- 2 1/2 cups all-purpose flour
- 1 teaspoon baking powder
- 1/2 teaspoon salt
- 1 cup crushed hard candy (like Jolly Ranchers for that pop of color!)
You’ll find the full ingredient list with measurements in the recipe card below!
How to Make Easy Stained Glass Cookies, Step-by-Step
Let’s get down to business! Here’s how to turn those simple ingredients into a beautiful batch of cookies:
- First things first, preheat your oven to 350°F (175°C). This is crucial, folks! A hot oven is your best friend.
- In a large bowl, cream together the softened butter and sugar until it’s light and fluffy. Seriously, you want it to look like a cloud of sweetness!
- Add in your egg and vanilla extract, mixing until everything is well combined. Don’t be afraid to channel your inner rock star here!
- In a separate bowl, whisk together the flour, baking powder, and salt. This is where the magic starts to happen!
- Gradually add the dry ingredients to the wet mixture, mixing until a dough forms. It should be soft but not too sticky—think of it like play dough!
- Now, chill the dough in the refrigerator for about 30 minutes. This makes it easier to handle when you roll it out.
- Once chilled, roll out the dough on a floured surface to about 1/4 inch thick. Don’t worry about being perfect; we embrace the quirky shapes here!
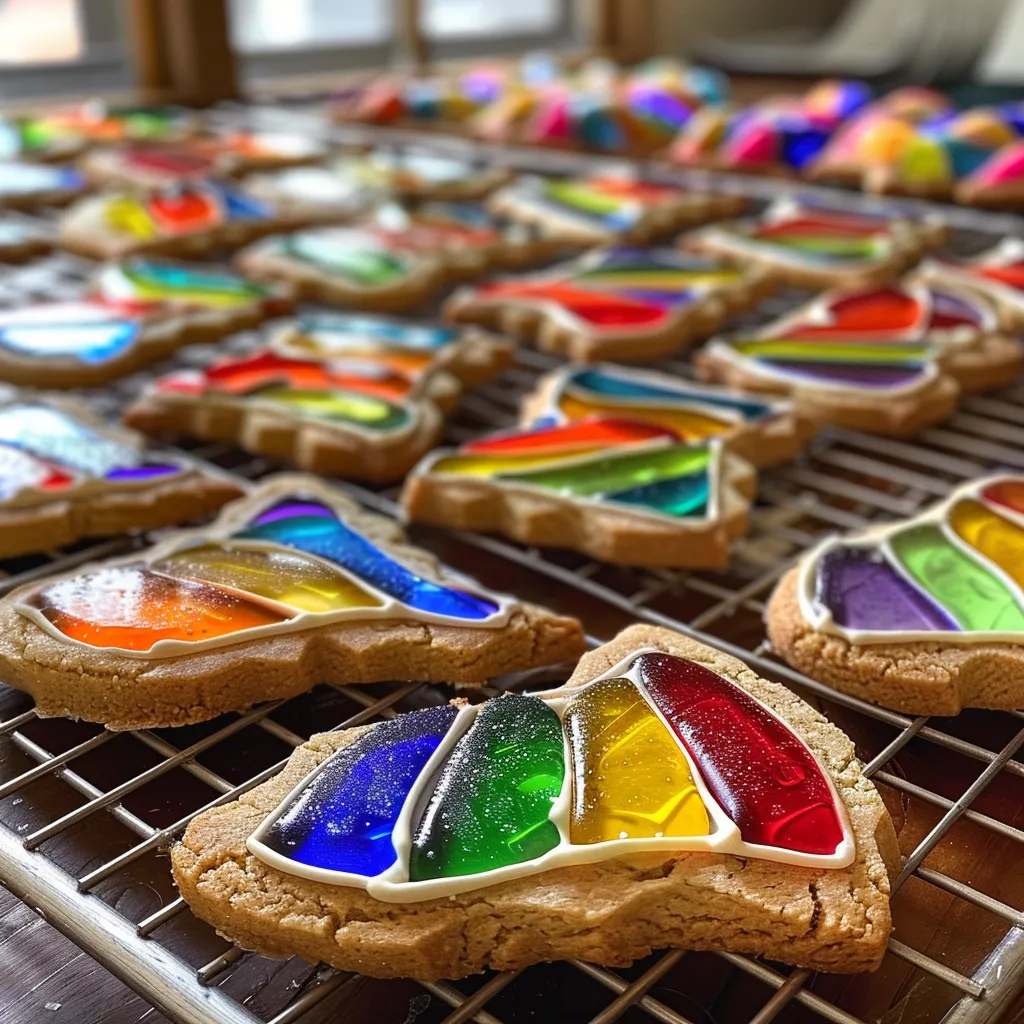
- Use cookie cutters to cut out shapes, and then cut out a smaller shape in the center of each cookie. This is where the stained glass effect comes into play. Yay!
- Place the cookies on a baking sheet lined with parchment paper. They need their comfy beds for baking.
- Fill the center cut-outs with crushed hard candy. Go wild with colors here!
- Bake in the preheated oven for 10-12 minutes, or until the edges are lightly golden. Your kitchen is about to smell heavenly!
- Allow the cookies to cool completely on a wire rack before serving. Patience, my friend—good things come to those who wait!
Pro Tips for the Best Results
Want to take your stained glass cookies from good to absolutely show-stopping? Here are a few pro tips:
- Make sure your butter is softened, not melted. We want creamy, not soupy!
- Experiment with different flavors of hard candy for a unique twist. Ever tried butterscotch or cinnamon? Trust me, it’s a game changer!
- If you’re making these with kids, let them pick out the candy colors. It’s a fun way to get them involved and excited!
Serving Suggestions
Now that you’ve got a batch of these beauties, how do you serve them? Oh, the possibilities are endless! Here are a few fun ideas:
- Arrange them on a colorful platter for a show-stopping dessert table at your next gathering.
- Package them in clear bags tied with festive ribbons for a sweet party favor.
- Pair them with a warm cup of tea or hot cocoa for a cozy afternoon snack.
Storage and Make-Ahead Tips
Wondering how to keep these scrumptious cookies fresh? Here’s the lowdown:
- Store cookies in an airtight container at room temperature for up to a week. They’ll stay delicious, I promise!
- You can freeze the dough for up to three months. Just wrap it tightly in plastic wrap and pop it in the freezer. When you’re ready for a cookie fix, just thaw and bake!
- These cookies are best enjoyed fresh, but if you’ve got leftovers (which is hard to imagine), just keep them sealed up to maintain their glassy goodness!

Easy Stained Glass Cookies
Ingredients
Method
- Preheat oven to 350°F (175°C).
- Cream butter and sugar, add egg and vanilla, then mix in dry ingredients to form dough.
- Chill dough for 30 minutes, then roll out to 1/4 inch thick.
- Cut out shapes, make smaller cut-outs, fill centers with crushed candy, and bake for 10-12 minutes.
- Cool completely before serving.
Notes
Loved this recipe? Save it to your favorite Pinterest board so you can easily find it later! It’s the perfect way to keep all your sweet ideas in one place. ✨